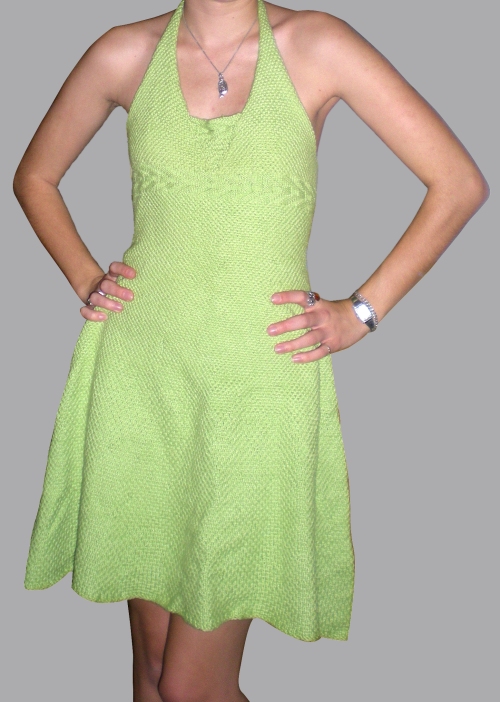
This is not an actual pattern, but is a tutorial for making a dress that will fit you.
Circular needles size 2, 4, 6, 7, 8, and 9
Knitpicks Shine Sport in Apple Green, 110 yards/skein: 11 skeins (for an XS dress that hits just above the knees. You will need more for a bigger size.)
a third size 2 needle for three-needle bind-off.
Notes:
This pattern is worked from just below the bust up starting with a crochet cast-on. Then a wedge section is knit between the two front pieces to make an insert, then the crochet cast-on pieces are picked up and the skirt of the dress is knit top-down.
I have a very flat chest, so this pattern doesn’t include any bust shaping. If you have a larger chest you will have to either include bust shaping or overlap the front of the dress to allow for it to expand.
Pattern Stitch: (knit flat)
Row 1: (WS) purl
Row 2:: K1, sl 1 with yarn in front
Row 3: purl
Row 4: sl1 with yarn in front, k1
*NOTE: Always knit the first and last stitch in the row, so it might start with 2 knits before the slipped stitch. Also, it is important that the slipped stitches stay where they are supposed to be with decreases, so on the following pattern row the slipped stitches should be on the opposite stitches than the last, as indicated by the stitch pattern here.)
(knit in the round)
Round 1: (RS) knit
Round 2: k1, sl 1 with yarn in front
Round 3: knit
Round 4: sl 1 with yarn in front, k1
Lace Pattern for Insert:
Row 1(WS): Purl
Row 2: k1, *sl1, k1, psso, M1; repeat from * to last stitch, k1
Row 3: purl
Row 4: K1, *M1, k2tog, repeat from * to last stitch, k1
Arrow Pattern:
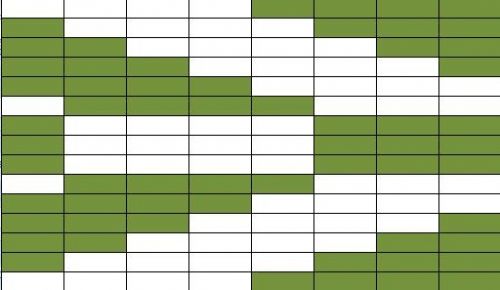
Key: Green is knit on right side, purl on wrong side. White is purl on right side, knit on wrong side,
VERY IMPORTANT: Make 4 by 4 inch gauge swatch on size 2 needles in the pattern stitch. As much as possible, the bodice of this dress should be made with zero ease.
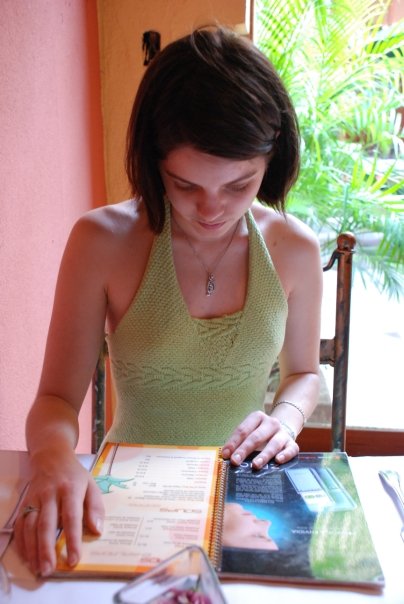
Dress Bust
Bust: (worked bottom-up)
Cast on enough stitches (determine this by the gauge swatch) to go around your bust just under your breasts using crochet cast-on. (Must be a multiple of 8 ) Do not join.
Continue in pattern, decreasing one stitch at each edge on every fourth row until piece measures 2 inches (or as high as you want the back).
Bind off stitches across the back (from the middle of each underarm. Try on if necessary to make sure it fits this way.)
Place one active section on waste yarn and continue knitting one front piece.
You will continue decreasing one stitch every fourth row on each edge until the piece is big enough to cover the entire breast (about the height of where the straps on a tank top would start), then once every eighth row on the armpit edge until there are eight stitches.
Continue knitting until the neck strap is long enough to meet halfway on the back of your neck (Keep in mind that this is supporting the whole dress, so it WILL stretch significantly, particularly when using the yarn called for. I have had to take out about four inches of knitting because of this. If you use a 100% cotton yarn, it will stretch less.)
Place these 8 stitches on waste yarn.
Pick up held stitches for other front section and work the same way.
Using three-needle bind off, bind off the two halter-sections to create a halter top, being sure not to twist either section.
Triangular Bust Insert:
Join the front of the two sections and begin working panel, picking up a stitch on each end from the edge of the bust section one every right-side row. This will make the section triangle-shaped while knitting it already attached to the front. This will save finishing later!
Continue doing this until it is about an inch shorter than you want it.
Begin working the arrow section (again, picking up one stitch from each edge every other row and incorporating this into the pattern.) Use chart, working from bottom of chart to top.
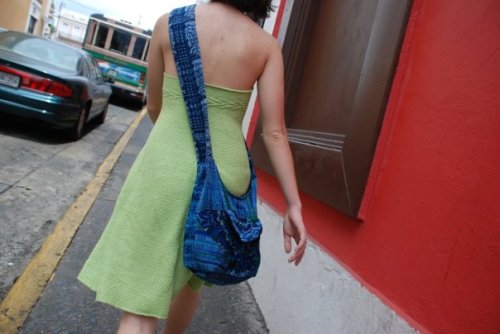
Skirt:
Using your gauge swatch, calculate how many stitches you will need to decrease for the number of rows between your bust and waist. To do this, determine how many stitches you need at the waist, and how many inches are between the two. You will decrease four times per row. Therefore you should divide the number of decreased stitches you have by four. This gives you the number of decrease rows. Divide the number of decrease rows by the number of rows you have between the arrow stripe and the waist.
At the end of that skein, change to size 6.
At the end of that skein, change to size 7.
You get the idea. Continue the skirt, moving up one needle size at the end of each skein until the skirt is as long as you like. Bind off.
Weave in ends.
Wear and look beautiful!
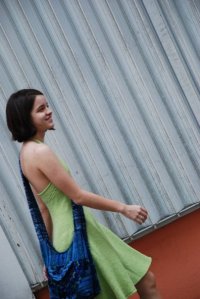
That dress is gorgeous! Love the colour. Thank you for posting this pattern x
By: Mollimoo on April 20, 2009
at 2:57 am
My time for wearing that dress is past, but it would look fabulous on my daughter! Thanks for posting it.
By: Liz on April 20, 2009
at 7:41 pm
Congrats on finishing it, and on the pattern. Looks beautiful 🙂
By: shortly24 on April 21, 2009
at 2:34 am
Thanks!
By: mamakass on April 22, 2009
at 5:02 pm
Wow what a lovely dress. The detail in the bust area is lovely.
Found you on Ravelry.
By: Leeanne on April 29, 2009
at 9:17 pm
Wow, that is absolutely gorgeous. I’d need a fab figure to pull off a dress like that!
By: Rain on May 23, 2009
at 7:43 am
I’m so glad that you like it!
By: mamakass on May 23, 2009
at 10:21 am
I love the dress, I’m trying to make it right now but I’m a bit at loss at the insert. How did you pick up stitches at both sides? I’ve tried a few different things but none of them worked.
I truly love the pattern, it’s a bit hard for me but I think it’ll work out. Thanks!
By: Galen on May 9, 2010
at 12:52 pm
Galen,
Are you using circular needles or straights?
There should be a loop at the edges of the bust flaps for every row. I used circular needles and whenever I got to a right-side row, I put the loop (half the last stitch) from each side onto my needles and then knit the row using those loops as stitches. The other half of the stitches will create a line along the insert.
If you have ravelry, you can see a closer-up shot of that here:
http://www.ravelry.com/projects/mamakass/pretty-green-dress
If you scroll down.
I’m sorry the picture is sort of out of focus, and I don’t have the dress right now to take better pictures.
I hope this helps. Please let me know if you need further clarification or if you have any other questions.
By: mamakass on May 10, 2010
at 6:16 pm
Love this dress!!! 😀 Beautiful design and awesome job!!!! I’m 22 and I love to knit so this would be awesome for me not only just to make it for me but to make it for my cousins who love to wear dresses like that!! What size was this dress in the instructions?
By: Christine on December 5, 2011
at 11:02 am
The dress in the picture is an XS, but the instructions are written so you have to do math to fit to the body you’re knitting for, so the pattern itself is not written for any size.
By: mamakass on December 5, 2011
at 10:06 pm
I am confused about the changes in needle sizes. In normal circumstances i would expect to see that I would have to change needle sizes to increase the length of the circular needles, not the diameter of the needle…looking at the pictures it doesn’t appear that your stitches are getting bigger as the dress gets longer. Is this what your doing or am i missing something.
By: Amy H on May 27, 2012
at 2:58 pm
The diameter of the needle does go up as you work your way down the skirt. It may be hard to tell on the screen, but my stitches do get substantially bigger toward the bottom of the skirt. This way, the top is a very tight fabric to provide coverage for the chest, and the bottom of the skirt has good draping characteristics.
Good luck, and let me know if you have any other questions.
Thanks,
Mamakass
By: mamakass on May 28, 2012
at 12:58 pm